ImageProcessing 1.0 Released
The ImageProcessing gem has just reached version 1.0, and I thought this would be a good opportunity to write an article about it. For those who don’t know, ImageProcessing is a wrapper gem that provides common image processing functionality needed when accepting image uploads from users (most notably resizing images).
It was originally written to be used with Shrine, because Paperclip, CarrierWave, Dragonfly, and Refile all came with their own image processing implementations that couldn’t be reused for Shrine. The goal was to extract knowledge from existing implementations into a gem that’s generic and reusable. The initial implementation was extracted from refile-mini_magick.
Original API
Until recently, the ImageProcessing::MiniMagick module was just a container
for common processing methods that use the MiniMagick gem, accepting file
objects on the input and returning file objects on the output.
require "image_processing/mini_magick"

include ImageProcessing::MiniMagick

original #=> #<File:/path/to/original.jpg>

result = resize_to_fit(original, 800, 800) # resize image to fit inside 800x800
result #=> #<Tempfile:/var/folders/k7/.../image_processing20180402-5116-1g0sibv.jpg>
You could also pass a block of code to add custom options to the ImageMagick command:
resize_to_fit(original, 800, 800) do |cmd|
  cmd.quality 100
end
# mogrify -quality 100 -resize 800x800 image.jpg
You might be asking now: why wouldn’t I just use MiniMagick directly? Well, let’s see how much ImageProcessing does for you:
resize_to_limit(original, 800, 800)

# would be roughly equivalent to

tempfile = Tempfile.new(["image_processing", File.extname(original.path)], binmode: true)

MiniMagick::Tool::Convert.new do |cmd|
  cmd << original
  cmd.resize "800x800>" # resize only if larger
  cmd << tempfile.path
end

tempfile.open # refresh file descriptor
tempfile
Limitations
This API was very simple to understand, but it had several limitations:
-
With the block implementation, it’s not possible to add custom ImageMagick options both before and after the resize operation. This is important because sometimes the order of ImageMagick options matters. For example,
-resampleshould probably be applied after-resize, not before.resize_to_fit(original, 800, 800) do |cmd| cmd.resample "72x72" # this is run before resizing, but you proably want after end # mogrify -resample 72x72 -resize 800x800 image.jpg -
Custom ImageMagick options were second-class citizens compared to the
#resize_to_fitmethods. This led to adding methods like#crop,#auto_orientand#resamplejust to avoid writing more code. This created a slippery slope, as it invited for adding more and more methods that just delegate directly to MiniMagick.# too verbose minimagick(original) { |cmd| cmd.crop "300x300+50+50" } # nicer, but what decides whether an option will receive a dedicated method? crop(original, "300x300+50+50") -
There was no easy way to specify default ImageMagick options that will be applied to each resize command, you had to pass the block for each command.
# add "-quiet" option to each resize command
large  = resize_to_limit(original, 800, 800) { |cmd| cmd.quiet }
medium = resize_to_limit(original, 500, 500) { |cmd| cmd.quiet }
small  = resize_to_limit(original, 300, 300) { |cmd| cmd.quiet }
square = resize_to_fill(original,  150, 150) { |cmd| cmd.quiet }
I wanted to come up with an improved API that would solve these problems.
New chainable API
Today the ImageProcessing::MiniMagick API looks like this:
result = ImageProcessing::MiniMagick
  .source(file)              # source image
  .loader(page: 0)           # load options
  .saver(quality: 100)       # save options
  .resize_to_limit(400, 400) # macro
  .strip                     # option
  .call                      # execute processing with above parameters

result #=> #<Tempfile:/var/folders/k7/.../image_processing20180402-5116-1g0sibv.jpg>
If you’ve ever used HTTP.rb, this kind of chainable API should look familar.
The processing parameters are specified via “builder methods” (#source,
#resize_to_limit, #quality, #strip), and at the end a “terminal method”
(#call) is invoked which executes the processing and returns the result.
You can invoke macros that are defined on the processor (#resize_to_limit,
#resize_to_fit, #resize_to_fill etc), while any undefined method will be
interpreted as an ImageMagick option (#strip, #resample, #crop etc).
The chainable API solves all the problems we’ve mentioned from the old API:
-
Adding ImageMagick options before and after the resize command is now trivial:
ImageProcessing::MiniMagick .auto_orient # before .resize_to_limit(400, 400) .resample("72x72") # after .call(image) -
Invoking direct ImageMagick options is now equally easy as invoking macros:
ImageProcessing::MiniMagick .resize_to_limit(400, 400) # macro .quality(100) # option .strip # option .call(image) -
Adding default ImageMagick options is now trivial:
pipeline = ImageProcessing::MiniMagick
  .source(file)
  .quiet # default "-quiet" option

# the "-quiet" option will be applied to each of these invocations
large  = pipeline.resize_to_limit!(800, 800)
medium = pipeline.resize_to_limit!(500, 500)
small  = pipeline.resize_to_limit!(300, 300)
square = pipeline.resize_to_fill!(150, 150)
What I like about this API is that it’s not a DSL, it’s just Ruby code that you have complete control over, so you can use regular Ruby conditionals, refactor complex processing into methods etc. It also doesn’t pollute the class that performs the processing with additional methods, as there is no module inclusion anymore.
In addition to the API, some very useful features got added to the gem as well.
Autorotation
When viewing a photo taken from a camera, most photo apps will normally rotate the photo as needed, so that it displays correctly regardless of whether it was taken in the “landscape” or “portrait” angle of the camera.
In reality, photos taken by the camera in “portrait” angle are often saved
sideways, along with an Orientation EXIF tag indicating the angle of the
camera, and most photo apps will see that EXIF data and automatically display
the photo in the correct orientation.
Unfortunately, this isn’t the case for some browsers. When you load a photo
that’s not correctly oriented into an <img> tag, the browser might ignore the
EXIF data and display the photo as-is, without rotating it.
That’s why it’s best to rotate the photo correctly when it is first uploaded to
your web app and then use the rotated photo when displaying it or when
generating thumbnails. ImageMagick supports this with the -auto-orient
option, and ImageProcessing adds this option by default.
ImageProcessing::MiniMagick.call(image)
# convert input.jpg -auto-orient ... output.jpg
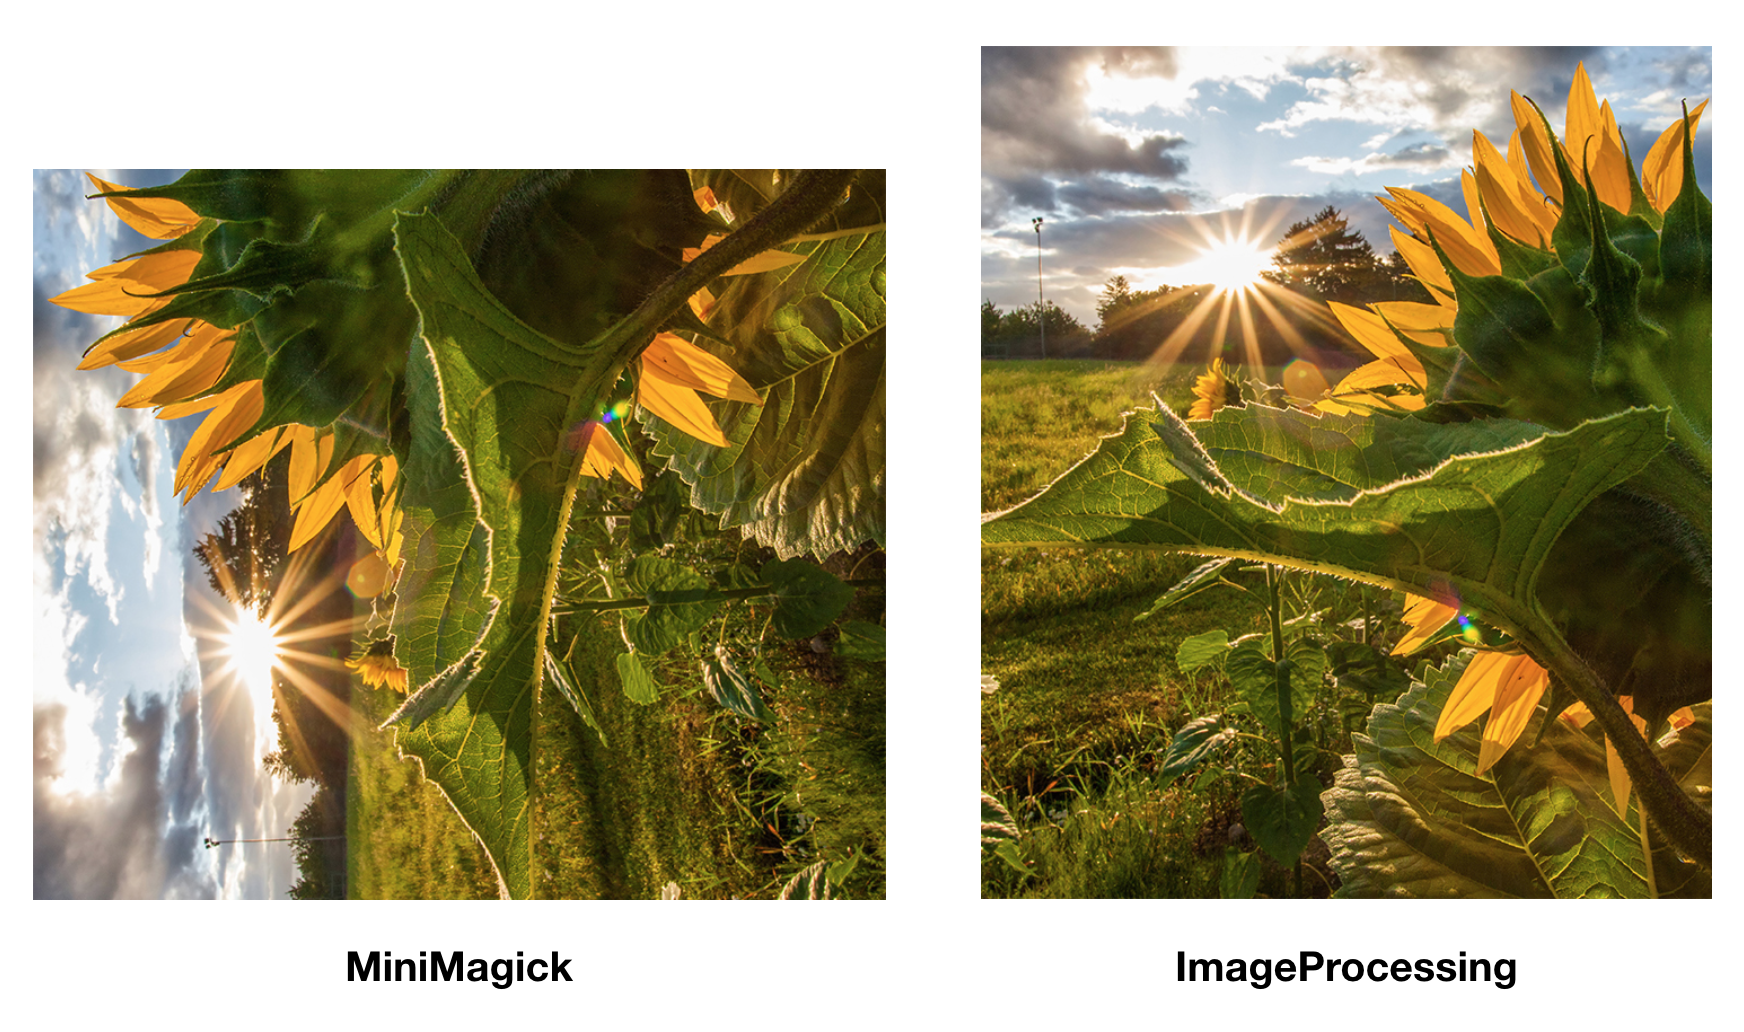
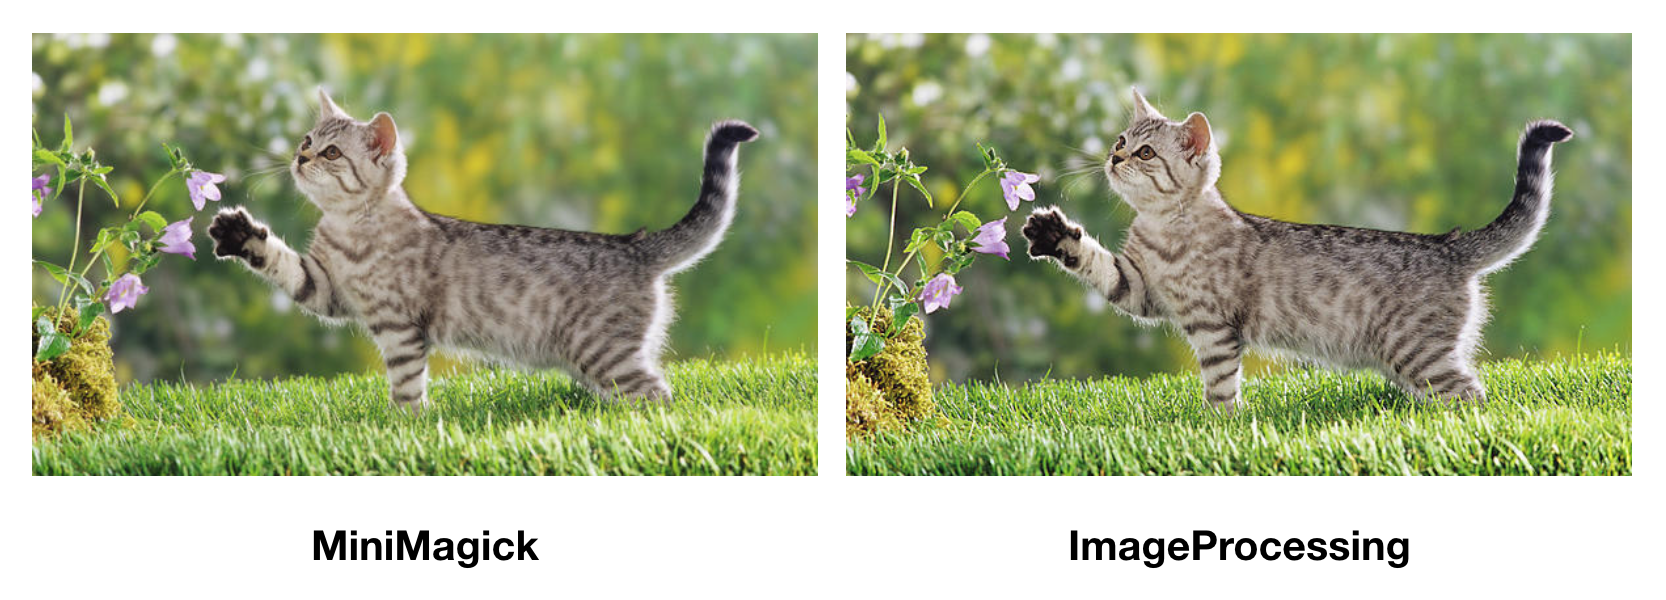
Sharpening thumbnails
When an image is resized, the thumbnail will end up slightly blurry compared to the original, due to the resizing algorithm. Did you know that it’s possible to address this? I didn’t, not until I started reading source code of other image processing wrapper libraries, and stumbled on some of them doing “sharpening” post-resize.
ImageMagick has a -sharpen option just for that, which ImageProcessing
automatically applies in the #resize_* macros after resizing.
ImageProcessing::MiniMagick.resize_to_fit(800, 800).call(image)
# convert input.jpg ... -resize 800x800 -sharpen 0x1 ... output.jpg
VIPS
Let’s see how long typical thumbnail generation might take with MiniMagick:
require "image_processing/mini_magick"

pipeline = ImageProcessing::MiniMagick.source("image.jpg")

puts Benchmark.realtime {
  large_2x  = pipeline.resize_to_limit!(1600, 1600)
  large     = pipeline.resize_to_limit!(800, 800)
  medium_2x = pipeline.resize_to_limit!(1000, 1000)
  medium    = pipeline.resize_to_limit!(500, 500)
  small_2x  = pipeline.resize_to_limit!(600, 600)
  small     = pipeline.resize_to_limit!(300, 300)
  square_2x = pipeline.resize_to_fill!(300, 300)
  square    = pipeline.resize_to_fill!(150, 150)
}
For this test image generating the thumbnails above took 7.2 seconds on my machine. This is reasonable, considering the source image has dimensions 3000x2000.
However, let’s try executing the same script again, but this time we’ll swap out the MiniMagick module for an alternative one (the resizing code remains unchanged):
require "image_processing/vips"

pipeline = ImageProcessing::Vips.source("image.jpg")

# ... resizing code remains the same ...
When I execute this on my machine, it now takes 0.8 seconds to generate the thumbnails. That’s a 9x speedup compared to the MiniMagick version, and all we had to do was change the constant name.
This is because the Vips module uses libvips to generate thumbnails, which performs significantly better than ImageMagick (see Why is libvips quick). Among other things, libvips automatically caches previous operations, which gives a huge speedup when generating multiple thumbnails from the same source image (see How libvips works for more details on caching).
So far we did uncover some minor limitations in libvips:
-
While libvips is able to load GIF files, it’s currently not able to save files in the GIF format. If you’re accepting GIFs, you’ll need to either convert them to another format or use ImageMagick.
-
The “autorotate” feature of libvips works only for orientation values of 1, 3, 6, and 8. This covers most images, but if you need to support other orientations you should probably use ImageMagick.
The ImageProcessing::MiniMagick and ImageProcessing::Vips modules both
share the same chainable API, and they aim to maintain the same API and
behaviour as much as possible (including autorotation and sharpening), so
switching from one to the other should be relatively easy.
Conclusion
If you’re processing images uploaded by users, ImageProcessing is a very useful gem to have in your toolkit. It abstracts common ways to generate thumbnails and includes some very useful defaults. It provides backends for both ImageMagick and libvips, making the API and behaviour as uniform as possible between the two implementations. Hopefully, this will help make libvips more mainstream in Ruby applications, like sharp has done for Node.js.
I like that for Shrine I decided not to write yet another homegrown solution for processing uploaded images, but instead created a generic library that anyone can use. This allowed it to grow independently and develop a proper API that can be used for a wider array of use cases.
Credits
I want to thank:
- @jnicklas for refile-mini_magick from which the initial implementation was extracted
- @GustavoCaso for the initial libvips implementation
- @mokolabs for all his help with sharpening and bringing ImageProcessing to version 1.0
- @jcupitt for maintaining the VIPS project for the last 13 years, and being exceptionally responsive to my libvips/ruby-vips inquiries
